

Table of Contents
ToggleDon’t let a platform switch destroy your organic traffic. Here is the exact 7-step checklist to migrate to Shopify with zero SEO data loss.
Quick Answer: How to Migrate to Shopify Without Losing Your SEO
Protecting your organic traffic and preserving your rankings when moving to Shopify comes down to mapping your existing SEO data to Shopify’s strict architecture. Here is your 7-step survival guide:
- Crawl your live site and export all current URLs, SEO Titles, and Meta Descriptions into a master “source of truth” spreadsheet.
- Convert your product, collection, and page data into Shopify-compatible CSV files.
- Adapt your old URL structures to fit Shopify’s mandatory subfolder system (/products/, /collections/, /pages/).
- Upload your content into Shopify, ensuring the SEO Title and SEO Description columns are perfectly populated.
- Map every single old URL to its new Shopify equivalent using 301 redirects to prevent catastrophic 404 errors and pass link equity.
- Verify your metadata, schema markup, and canonical links on your unpublished Shopify development theme.
- Point your domain to Shopify’s DNS and strictly monitor Google Search Console for crawl errors.
You are migrating to Shopify because you want to spend less time managing your tech stack and more time growing your sales. Whether you are currently on WooCommerce, Magento, or Wix, you are ready to leverage Shopify’s built-in speed, stability, and world-class checkout experience.
But there is a massive elephant in the room: Will this migration destroy your organic traffic?
If your store relies on Google for consistent daily sales, migrating to a new platform is terrifying. One missed step can wipe out years of hard-earned SEO authority, revert your custom meta descriptions to default product names, and trigger thousands of 404 broken links.
The good news? A traffic drop is not inevitable.
The Nightmare Scenario: What’s Terrifying You About Shopify Migration?
Whenever we consult with e-commerce owners at DITS.agency about replatforming, the same anxieties surface:
- “Will my best-selling products drop from page 1 of Google?” * “Are my custom meta descriptions going to be deleted during the import?”
- “How much revenue will I lose during the ‘transition dip’?”
These aren’t just anxieties; they are business-critical risks. Shopify handles SEO a bit differently than other platforms. It uses a rigid URL structure and specific CSV headers. If you blindly use a generic export/import tool without understanding Shopify’s data mapping, your SEO fields will likely be left blank. Your conversion rates will plummet, and your competitors will gladly steal your top spots in search results.
The Solution: 3 Safe Ways to Relocate Your Shopify Store
You don’t need to be a senior backend engineer to handle this safely, but you do need a strategy that matches your store’s complexity and your tolerance for risk.
Here are three proven approaches to relocating your store to Shopify while strictly safeguarding your SEO meta-tags:
- The Automated Route: Using specialized migration apps (like Matrixify or Cart2Cart) to map and deploy your data. Best for small-to-medium stores with standard data structures.
- The Pro CSV Route: Taking complete manual control over Shopify’s native CSV import framework to dictate exactly what goes into every single SEO Title and Description field.Best for stores with highly customized metadata.
- The Hands-Free Route: Hiring e-commerce developers and technical SEOs to manage the heavy lifting, structural mapping, and post-migration QA.Best for enterprise stores where an SEO drop would cost thousands of dollars.
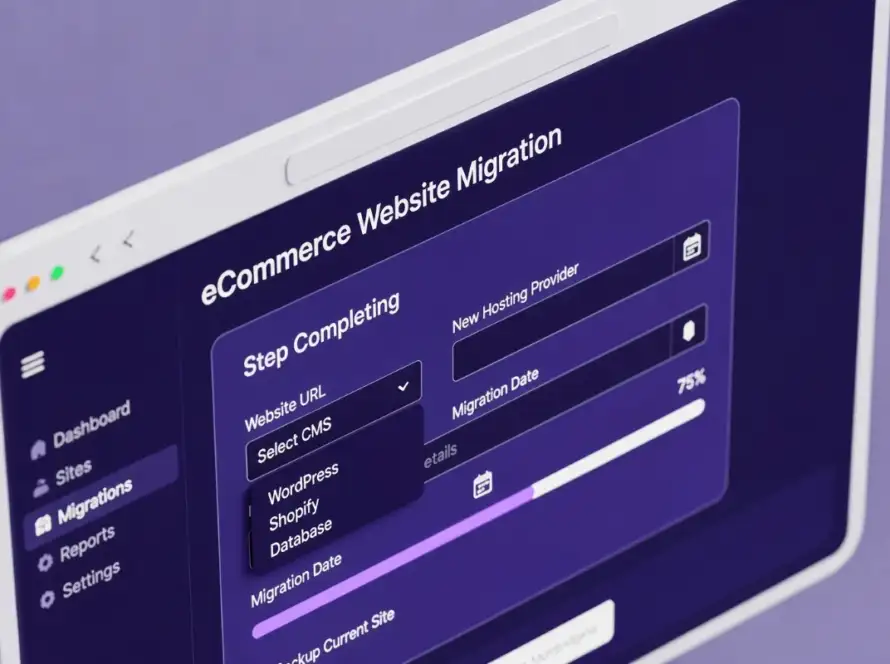
You can also read eCommerce Website Migration Guide
Don’t Want to Gamble With Your Organic Revenue?
Store migration is stressful. A single broken redirect strategy can tank your Google rankings and stop sales overnight. If your SEO traffic is simply too valuable to risk, let our experts do the heavy lifting. Get professional Shopify migration services from DITS.agency today and enjoy a seamless, zero-downtime move to your new store.
Shopify Pre-Migration Checklist (Your Revenue Insurance)
A successful, drop-free platform transition relies 100% on what you do before you initiate the data transfer. To secure your SEO equity, follow these three essential preparation steps.
1. Store Housekeeping: Don’t Migrate Dead Weight
One of the easiest ways to prevent migration errors is to reduce unnecessary data. A leaner database means cleaner export archives, faster imports, and fewer chances for URLs to break.
- Axe Discontinued Products: If a product has been out of stock for years, brings in zero search traffic, and holds no backlinks, delete it on your old platform before exporting.
- Clean Up Tag Clutter: Remove temporary seasonal tag pages or duplicate categories that complicate your site architecture.
- Fix Existing Broken Links: Run an SEO crawler (like Screaming Frog or Ahrefs) to identify and fix internal 404 errors. Do not bring your old platform’s bugs into your pristine new Shopify store.
2. The Golden Rule: Build a Master SEO Backup
Never attempt to migrate without a comprehensive backup of your current search footprint. You must crawl your entire live website and export a master spreadsheet. Think of this as your SEO insurance policy. It must contain:
- All live URLs currently indexed by Google.
- Existing Meta Titles and Meta Descriptions for every product, category, and post.
- H1 headers and current canonical tags.
If Shopify’s automated importer ever truncates your descriptions or ignores custom fields, this spreadsheet is the only way you will be able to restore them. Keep it safe.
3. Gather Your Migration Toolkit
Ensure you have a secure document containing the following access points ready to go:
- Old Platform Admin: Full access to your current backend (WordPress/WooCommerce, Magento, etc.) to generate clean CSV/XML exports.
- Shopify Admin: Administrator access to your new development store.
- Domain Registrar: Credentials for your DNS provider (Namecheap, Cloudflare, GoDaddy) so you can seamlessly point your domain to Shopify’s servers when it’s time to go live.
Method 1: The Automated Route (Using Migration Apps)
If you want to handle the migration yourself but want to avoid manually editing thousands of spreadsheet rows, automated apps are the way to go. This method gives you a great balance of control and speed.
In the e-commerce industry, we generally rely on two main tools. Matrixify is considered the gold standard for Shopify data, giving you incredible precision over your deep metafields and custom SEO setup. Alternatively, LitExtension is a fantastic choice if you want to connect your old store directly to Shopify via an API bridge to transfer your products and categories automatically.
How to Transfer Your Metadata with an App
Step 1. Install your chosen migration tool from the Shopify App Store and connect it to your new development store.
Method 2: The Pro Route (Manual CSV Import)
If you are managing a large-scale enterprise store, a custom theme architecture, or a setup that uses advanced metaobjects, handling your CSV files natively gives you the highest level of control. It allows you to completely bypass the limitations of automated, black-box migration tools.
Step-by-Step: Formatting Meta-Tags in Shopify CSVs
Shopify uses a highly specific CSV schema for importing products, pages, and collections. To ensure your custom meta tags transfer correctly without dropping your rankings, you need to inject your audited data directly into Shopify’s designated layout. Here is how to do it step-by-step:
Step 5. Save your final file as a standard UTF-8 encoded CSV. Head back to your Shopify admin, click Import, and upload your file. Just make sure to uncheck the option that says “Overwrite any current products” unless you are specifically trying to update existing entries.
Read about eCommerce Website Migration Guide
Why Trust DITS.agency with Your Shopify Migration?
At DITS.agency, we specialize in transitioning complex web ecosystems into highly optimized Shopify environments. Whether it’s structuring custom Liquid themes, mapping out intricate metaobjects, or running rigorous post-migration SEO audits, our team ensures your transition is seamless, safe, and built to scale from day one.
Post-Migration Actions & Testing
At this stage, your assets are securely uploaded to Shopify. However, your work isn’t finished. If you skip this phase, you risk showing your visitors broken pages and tanking your search authority.
1. Build Your 301 Redirect Map (The Search Shield)
Because Shopify enforces strict subfolders (/products/> for items, /collections/ for categories), your old URLs will not match your new ones. If your old product URL was [mystore.com/leather-boots](https://mystore.com/leather-boots), Shopify will now force it to [mystore.com/products/leather-boots](https://mystore.com/products/leather-boots).
Without a 301 redirect map, anyone clicking your old links from Google will hit a frustrating 404 error page.
You can set these up directly inside your Shopify dashboard:
- Go to Online Store > Navigation > URL Redirects.
- Click Create URL redirect.
- Enter your old path in the Redirect from box, and your new Shopify path in the Redirect to box.
| Old URL Path (Redirect From) | New Shopify Path (Redirect To) |
|---|---|
| /leather-boots | /products/premium-leather-boots |
| /product-category/shoes | /collections/footwear |
| /about-our-company | /pages/about-us |
2. Verify Your Meta-Tags on the Live Theme
Before pointing global traffic to your new store, check your theme’s head configurations. Open a few staging pages, right-click, select View Page Source, and verify that the <title> and <meta name=”description”> tags exactly match the entries from your audit spreadsheet. If they are missing or displaying default templates, double-check your theme’s theme.liquid file to ensure the standard output tags are intact:
3. Update Your DNS Records (The Switch)
Once you are 100% confident that the metadata is intact and your redirect map is loaded, point your live domain to Shopify. Log into your domain registrar account and update your records to match Shopify’s global architecture:
- Change your A Record to point to Shopify’s IP address: 23.227.38.65
- Change or create your CNAME Record for www to point to: shops.myshopify.com/li>
4. Submit Your New Sitemap to Google Search Console
Submit your new sitemap to Google Search Console. Shopify automatically generates a clean XML sitemap at the root level of your domain (yourstore.com/sitemap.xml). As soon as your DNS propagates and your site goes live, log into Google Search Console, navigate to the Sitemaps section, and submit this new path. This forces Google’s web crawlers to quickly discover your new layout and process your 301 redirects, securing your hard-earned SEO traffic.Common Shopify Migration SEO Errors & How to Fix Them
Even experienced developers can run into occasional snags during a major platform shift. If things don’t look quite right after your import, don’t panic. Here are the quick fixes for the most common migration errors:| Error | Root Cause | How to Fix It |
|---|---|---|
| Massive Spike in 404 Pages | 301 redirects were either skipped, or the old paths were mapped using absolute URLs instead of relative paths. | Export your redirect list in Shopify. Ensure all "Redirect from" lines use relative paths (e.g., /old-page), not absolute ones (https://site.com/old-page), and re-upload the map. |
| Meta Titles Truncated or Broken | Special characters or HTML entities inside your CSV corrupted the cell encoding during the import process. | Re-save your import spreadsheet specifically as CSV UTF-8 (Comma delimited). Re-import the affected rows using an app like Matrixify to safely overwrite the broken metadata. |
| Duplicate Content Warnings | Your Shopify theme might be creating multiple URL variants for a single product (such as collection-aware product URLs). | Ensure your theme uses proper tags within the template's section to point Google back to the absolute product page. |
Conclusion & Final Best Practice
Once your Shopify store is running flawlessly, keep your old hosting platform or archive server active for at least 14 days. This guarantees that any lingering search traffic or deep-linked crawls caught in the global DNS propagation window will still resolve correctly. Only close your old billing accounts once Google Search Console demonstrates that your new Shopify paths are being indexed smoothly and old links successfully pass their equity over via 301 headers.
Skip the Technical Hassle – Move with DITS.agency
Why spend your nights troubleshooting CSV cells, matching column headers, and risking your hard-earned organic traffic when you can have a team of certified professionals handle it?
At DITS.agency, we specialize in high-stakes e-commerce development and rock-solid platform migrations. We don’t just move your products; we optimize your theme architecture, secure your complete SEO footprint, protect your custom meta-tags, and perform meticulous post-migration QA to ensure your store scales effortlessly.
Contact DITS.agency Specialists Now and transition your business to Shopify with total peace of mind.
You can also read: